Residential Exterior Siding Replacement & Window Flashing Preparation (helpful job reference)
Tools List
- Sawzall (Reciprocating saw) (for cutting old siding, cleanups, and rough window openings)
- Pry bar (for pulling old siding)
- Hammer (for pounding in rogue nails or helping pry)
- Tape measure (for checking reveals and measuring cuts)
- Chalk line / Level (to mark a straight, level line for the first siding piece)
- Siding installation jigs (specifically for Allura fiber-cement siding to ensure a 5–6 inch reveal)
- Zip tape roller (mandatory tool provided by Ken for pressing seam flashing tape)
- Caulking gun (for applying caulk)
- Paintbrush (for applying primer to cut siding edges)
- Utility knife (for cutting house wrap) Materials List
- 7/16" OSB Sheeting (wall sheathing)
- House wrap (weather barrier)
- Button nails (plastic-cap nails used every 16" to hold house wrap)
- Zip Flash Tape (flashing tape for window openings)
- Windows with installation flanges
- Trim boards (for window perimeters, house corners, and soffits)
- Allura Fiber-Cement Lap Siding
- Aluminum flashing strips (placed behind siding-to-siding butt joints)
- Siding primer (for bare cut edges)
- Exterior paintable caulk (for sealing the 1/8" gaps between siding and trim)
-
- Demo Old Siding & Clean Studs
Phase 1
Use a Sawzall between the wall studs to cut old siding loose, then pull it off with a pry bar and hands. Clean up the bare studs by cutting old nails flush with a Sawzall or pounding them in flat with a hammer. How to verify: The wall framing studs should be clear of old wood and smooth, with no protruding nails.
phase 1 helpful vids
-
- Install OSB Sheathing
Phase 2
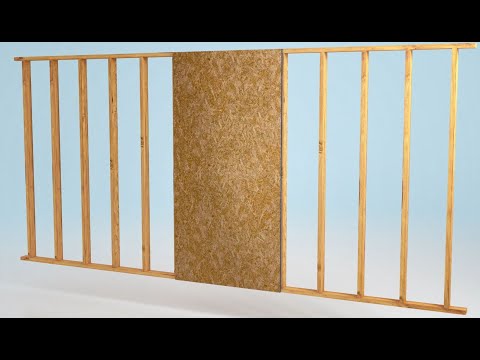
Attach 7/16" OSB sheets vertically to the studs starting from the bottom up. Run full sheets right over window openings, then go inside and use a Sawzall to trace the window frame out. Ensure the OSB stays set back 1/8" from window openings rather than pushing into the rough opening. How to verify: The walls are completely covered, and window openings have a slight 1/8" stud border exposed.
phase 2 helpful vids
-
- Apply House Wrap
Phase 3
Start at a house corner, wrapping 3 to 4 feet around the corner while keeping the roll level. Unroll horizontally across the wall with multiple people keeping it smooth and tight. Fasten with button nails every 16". For windows, cut an "X" in the wrap over the opening, fold the flaps inside, fasten them, and trim the excess. How to verify: House wrap covers the OSB completely flat with no sags, wrinkles, or slanted lines.
phase 3 helpful vids

-
- Tape Rough Openings & Set Windows
Phase 4
Apply Zip Flash tape around all four inside edges of the window opening in this exact order: Bottom \rightarrow Sides \rightarrow Top. Roll the tape firmly using the roller. Mount the window in the opening, then tape over the window's outer flanges on the Left/Right Sides, and finish with the Top (do not tape the bottom flange). How to verify: All window flanges are sealed except the bottom edge, allowing trapped moisture to drain outward.
phase 4 helpful vids


-
- Install Trim Boards
Phase 5
Install trim around the window frames, outside house corners, and along the soffit line so all edges are flush. How to verify: Trim boards are secured square around all edges and openings.
phase 5 helpful vids
6. 6. Install Lap Siding & Flash Joints
Phase 6 Rip a starter strip of siding in half along the bottom to set your baseline level. Use the installation jigs to work upward, keeping a consistent reveal.
- Siding-to-Siding Seams: Place a strip of aluminum flashing behind the joint and prime any cut edges.
- Siding-to-Trim Edges: Leave a mandatory 1/8" gap between the siding edge and the trim board. How to verify: Siding courses line up level, aluminum flashing is behind every siding joint, and 1/8" gaps exist around all trim.
phase 6 helpful vids

7. 7. Caulk Gaps
Phase 7 Run a clean bead of exterior caulk into all 1/8" gaps where siding meets window trim and corner boards. How to verify: Every trim-to-siding border is fully sealed with caulk with no open cracks.